OpenShiftでPVの中身を別のPVへ移行する
OpenShift 全部俺 Advent Calendar 2017
OpenShiftやKubernetesでPVを作って使ってたらPVが一杯になってしまったので大きなサイズのPVへ移行したい、であるとか、HDDのPVを使ってたけどSSDのPVに変えよう、というようなデータ移行のユースケースが発生します。
OpenShiftのdocker-reigstyのPVを移行してみましょう。
oc project default
### 現在のPVC名とボリューム名の確認 (この例では registry と registry-storage)
oc get pvc
### docker-registryを一旦停止
oc scale dc docker-registry --replicas=0
### データ移行に利用するno-opコンテナを起動
oc run sleep --image=registry.access.redhat.com/rhel7 -- tail -f /dev/null
### 現在のPVCをno-opコンテナにマウント
oc volume dc/sleep --add -t pvc --name=registry --claim-name=registry --mount-path=/old-registry
### 新しいPV/PVCをno-opコンテナにマウント(dynamic provisioning前提、dynamic provisioningがないならPVを事前に設定)
oc volume dc/sleep --add -t pvc --name=new-registry --claim-name=new-registry --mount-path=/new-registry --claim-mode=ReadWriteMany --claim-size=400Gi
### no-opコンテナにrsh
oc rsh sleep-X-XXXXX
### no-opコンテナ上でデータをrsyncで移行
rsync -avxHAX --progress /old-registry /new-registry
### docker-registryを現在のPVから新しいPVへスイッチ
oc volume dc/docker-registry --remove --name=registry-storage --confirm
oc volume dc/docker-registry --add -t pvc --name=registry-storage --claim-name=new-registry --mount-path=/registry
### docker-registryを再開
oc scale dc docker-registry --replicas=1
問題なければ古いPVCは消して良いでしょう。
KubernetesだとOpenShiftのoc volumeのようなコマンドが無いと思いますが、新PVCとデータ移行Podをapplyして同じ作業をすれば良いはずです。
他にkubectl cpでデータ吸い出してPV/PVC切り替えて新しいPodに書き戻す、という安直なアプローチもありますが、アプリが動いたままで書き込み途中のデータを吸い出してしまったり、バックアップ後に書き込まれたデータがロストしたり、新しいPodがデータを上書きされる想定ではないので誤動作する、などの可能性があるので注意しましょう。
OpenShiftでDockerfileやバイナリビルド利用してコンテナをビルドする
OpenShift 全部俺 Advent Calendar 2017
昨日はギョウザパーティでした。基本のs2iビルドではソースコードからビルドしましたが、今回はDockerfileを利用します。
ソースコードと同じようにDockerfileが置いてあるGit URLを指定すると同じようにビルドできるのですが、それでは面白くないのでちょっとアドホックなビルドをしてみましょう。
tail -f /dev/nullを実行するコンテナイメージを作成するDockerfileをGitを利用せずにOpenShiftに食べさせてみます。oc new-buildでビルドしてからoc new-appでImageStreamを指定してアプリケーションを作成という流れになります。
oc new-project test-dockerbuild
cat <<EOF > Dockerfile
FROM registry.access.redhat.com/rhel
CMD tail -f /dev/null
EOF
cat Dockerfile | oc new-build --dockerfile=- --to=sleep
oc logs sleep-1-build -f
oc new-app sleep
できました。デプロイされたコンテナを見ると実行されていますね。
$ oc rsh dc/sleep ps aux
USER       PID %CPU %MEM    VSZ   RSS TTY      STAT START   TIME COMMAND
1000080+     1  0.0  0.0   4352   352 ?        Ss   06:34   0:00 tail -f /dev/nu
1000080+    16  0.0  0.0  47448  1612 ?        Rs+  06:35   0:00 ps aux
この方式だとDockerfileはBuildConfigに埋め込まれているので、以降内容を編集する場合はoc edit bcで直接編集できます。
$ oc export bc sleep
kind: BuildConfig
spec:
  source:
    dockerfile: |
      FROM registry.access.redhat.com/rhel
      CMD tail -f /dev/null
    type: Dockerfile
ただし、上記のDockerfile埋め込みだとビルドコンテキストが渡せないので、ファイルをイメージ内にコピーしたりしたいときに困ります。そのような場合はバイナリビルドにしてoc start-build時にディレクトリをまるごと転送する、というのもできます。
oc new-build --strategy=docker --binary=true --name=$APP_NAME
oc start-build $APP_NAME --from-dir=.
oc new-app $APP_NAME
バイナリビルドはDockerfileに限らず、s2iのソースツリーでも同じようにGitを経由しないビルドができます。
ちなみにDockerfileを利用したビルドは現状docker daemon内、つまりrootで実行されているためセキュリティレベルとしては最低です。このため、OpenShift OnlineではDockerビルドは無効化されています。そのうちbuildahなどを利用してdocker daemonとは無関係の通常権限でのDockerfileビルドもできるようになるとは思いますが、そこまでしてDockerfile形式を利用しなければならない理由もあまり無いので、より扱いやすいコンテナイメージの記述およびビルド方式が先にサポートされる気もします。
OpenShift Container Platform 3.7をシングルノードでインストールする
OpenShift 全部俺 Advent Calendar 2017
商用版のOpenShift Container Platform 3.7をシングルノードでインストールしてみます。
利用する/etc/ansible/hostsファイルの中身はこんな感じです。OpenShift Container Platform 3.6以前ではシングルマスター構成ではmaster-api, master-controllers, etcdが全部一つのプロセスmasterで動作する構成でしたが、管理性向上のため3.7ではこれは廃止され、マルチマスターと同一のプロセス構成になりました。
[OSEv3:children]
masters
etcd
nodes

[OSEv3:vars]
ansible_ssh_user=nekop
ansible_become=true
deployment_type=openshift-enterprise
openshift_master_identity_providers=[{'name': 'allow_all', 'login': 'true', 'challenge': 'true', 'kind': 'AllowAllPasswordIdentityProvider'}]
os_sdn_network_plugin_name=redhat/openshift-ovs-multitenant
openshift_node_kubelet_args={'kube-reserved': ['cpu=100m,memory=100Mi'], 'system-reserved': ['cpu=100m,memory=100Mi'], 'eviction-hard': [ 'memory.available<4%', 'nodefs.available<4%', 'nodefs.inodesFree<4%', 'imagefs.available<4%', 'imagefs.inodesFree<4%' ], 'eviction-soft': [ 'memory.available<8%', 'nodefs.available<8%', 'nodefs.inodesFree<8%', 'imagefs.available<8%', 'imagefs.inodesFree<8%' ], 'eviction-soft-grace-period': [ 'memory.available=1m30s', 'nodefs.available=1m30s', 'nodefs.inodesFree=1m30s', 'imagefs.available=1m30s', 'imagefs.inodesFree=1m30s' ]}
openshift_disable_check=memory_availability,disk_availability
openshift_master_default_subdomain=apps.example.com

[masters]
s37.example.com

[etcd]
s37.example.com

[nodes]
s37.example.com openshift_node_labels="{'region': 'infra'}" openshift_schedulable=true
rootでssh-copy-idしてあるstatic IPを持つRHEL 7.4 VMからスタートし、インストールの事前準備はこんな感じで流しています。dockerのstorage driverはoverlay2を指定します。
HOSTNAME=s37.example.com
RHSM_USERNAME=
RHSM_PASSWORD=
RHSM_POOLID=
OPENSHIFT_VERSION=3.7

hostnamectl set-hostname $HOSTNAME
timedatectl set-timezone Asia/Tokyo
adduser -G wheel nekop
cat << EOM > /etc/sudoers.d/wheel
%wheel ALL=(ALL) NOPASSWD: ALL
Defaults:%wheel !requiretty
EOM
mkdir /home/nekop/.ssh/
cp -a /root/.ssh/authorized_keys /home/nekop/.ssh/
chown nekop.nekop -R /home/nekop/.ssh/
subscription-manager register --username=$RHSM_USERNAME --password=$RHSM_PASSWORD
subscription-manager attach --pool $RHSM_POOLID
subscription-manager repos --disable=*
subscription-manager repos \
     --enable=rhel-7-server-rpms \
     --enable=rhel-7-server-extras-rpms \
     --enable=rhel-7-server-optional-rpms \
     --enable=rhel-7-server-rh-common-rpms \
     --enable=rhel-7-fast-datapath-rpms \
     --enable=rhel-7-server-ose-$OPENSHIFT_VERSION-rpms

yum update -y
yum install chrony wget git net-tools bind-utils iptables-services bridge-utils nfs-utils sos sysstat bash-completion lsof tcpdump yum-utils yum-cron docker atomic-openshift-utils -y
sed -i 's/DOCKER_STORAGE_OPTIONS=/DOCKER_STORAGE_OPTIONS="--storage-driver overlay2"/' /etc/sysconfig/docker-storage
systemctl enable chronyd docker
reboot
これでインストールの準備が整ったので、ログインしなおした後にssh keyを用意してssh-copy-idしてansibleします。問題なければ再度確認も兼ねて一応rebootするようにしています。
ssh nekop@s37.example.com
ssh-keygen
ssh-copy-id s37.example.com
vi /etc/ansible/hosts
ansible-playbook -vvvv /usr/share/ansible/openshift-ansible/playbooks/byo/config.yml | tee -a openshift-install-$(date +%Y%m%d%H%M%S).log
reboot
マルチノードの場合はglusterも一緒にセットアップできるのでglusterでPVを使えるようにするのがラクなんですが、シングルノードなのでhostPathでPVを作成しておきます。SELinuxでコンテナからのアクセスを許可するのにchconでsvirt_sandbox_file_tを設定します。
COUNT=100

sudo mkdir -p /var/lib/origin/openshift.local.pv/
for i in $(seq 1 $COUNT); do
    PVNAME=pv$(printf %04d $i)
    sudo mkdir -p /var/lib/origin/openshift.local.pv/$PVNAME
    cat <<EOF | oc create -f -
apiVersion: v1
kind: PersistentVolume
metadata:
  name: $PVNAME
spec:
  accessModes:
  - ReadWriteOnce
  - ReadWriteMany
  - ReadOnlyMany
  capacity:
    storage: 100Gi
  persistentVolumeReclaimPolicy: Retain
  hostPath:
    path: /var/lib/origin/openshift.local.pv/$PVNAME
EOF
done
sudo chcon -R -t svirt_sandbox_file_t /var/lib/origin/openshift.local.pv/
sudo chmod -R 777 /var/lib/origin/openshift.local.pv/
Reference
Red Hat OpenShift Application Runtimes
OpenShift 全部俺 Advent Calendar 2017
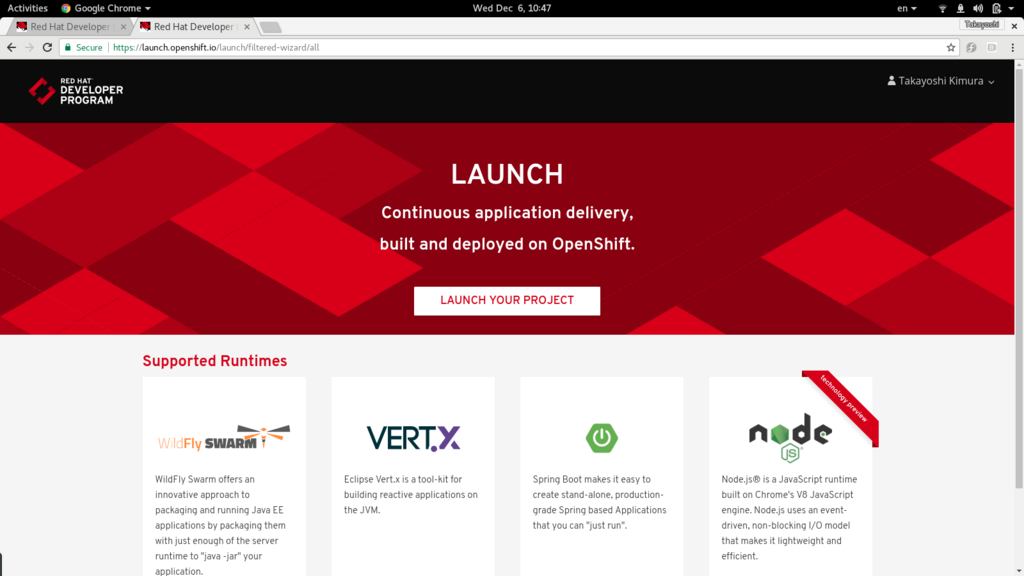
Red Hat OpenShift Application Runtimesがリリースされたのでさわってみたいと思います。Spring BootやVert.x, WildFly Swarmなどを使ってOpenShift上でマイクロサービスアプリケーションの開発をサポートする製品です。
https://launch.openshift.io/ というサイトでプロジェクトのひな型が作成できるので、まずはそれを利用してWildFly Swarmのプロジェクトを見てみましょう。

生成されたプロジェクトはローカル開発とOpenShiftを利用した開発の両方に対応するfabric8を活用したプロジェクトのようです。oc get allを見てみると、Binaryビルドなので、ソースからOpenShift側でビルドされるのではなく、ローカルでビルドしたwarファイルを転送してコンテナイメージをビルドしている構成です。
$ mvn clean fabric8:deploy
(長いので省略)
$ oc get all
NAME                                          TYPE      FROM      LATEST
buildconfigs/booster-crud-wildfly-swarm-s2i   Source    Binary    1

NAME                                      TYPE      FROM      STATUS     STARTED         DURATION
builds/booster-crud-wildfly-swarm-s2i-1   Source    Binary    Complete   2 minutes ago   2m3s

NAME                                      DOCKER REPO                                             TAGS      UPDATED
imagestreams/booster-crud-wildfly-swarm   172.30.1.1:5000/test-rhoar/booster-crud-wildfly-swarm   latest    50 seconds ago

NAME                                           REVISION   DESIRED   CURRENT   TRIGGERED BY
deploymentconfigs/booster-crud-wildfly-swarm   1          1         1         config,image(booster-crud-wildfly-swarm:latest)

NAME                                HOST/PORT                                                     PATH      SERVICES                     PORT      TERMINATION   WILDCARD
routes/booster-crud-wildfly-swarm   booster-crud-wildfly-swarm-test-rhoar.192.168.42.143.nip.io             booster-crud-wildfly-swarm   8080                    None

NAME                                        READY     STATUS      RESTARTS   AGE
po/booster-crud-wildfly-swarm-1-deploy      1/1       Running     0          18s
po/booster-crud-wildfly-swarm-1-fgdj8       0/1       Running     0          15s
po/booster-crud-wildfly-swarm-s2i-1-build   0/1       Completed   0          2m

NAME                              DESIRED   CURRENT   READY     AGE
rc/booster-crud-wildfly-swarm-1   1         1         0         18s

NAME                             CLUSTER-IP     EXTERNAL-IP   PORT(S)    AGE
svc/booster-crud-wildfly-swarm   172.30.79.11   <none>        8080/TCP   20s
BuildConfigを見ると利用イメージがregistry.access.redhat.com/redhat-openjdk-18/openjdk18-openshiftになっているので、これを使えば手元でビルドしてバイナリ転送ではなく、OpenShift側でソースからビルド(s2iビルド)でも大丈夫でしょう。
というわけでRHOARを利用した最小のSwarmプロジェクト https://github.com/nekop/hello-swarm を作ってみました。
$ oc new-project test-swarm
$ oc new-app registry.access.redhat.com/redhat-openjdk-18/openjdk18-openshift~https://github.com/nekop/hello-swarm
$ oc expose svc hello-swarm
$ curl hello-swarm-test-rhoar.192.168.42.143.nip.io
hello world
OpenShiftのocコマンドの基本
OpenShiftを利用するにあたって、最初に覚えておいたほうが良いいくつかのコマンドがあります。例えばoc get allとoc get eventです。うまくいかないときなどは大抵この2つを参照することになります。
ocコマンドはヘルプが充実しているので、わからないことがあったらまず-hオプションを付与するクセをつけましょう。oc -hの出力を末尾にのせておきます。
利用頻度順にいくつか紹介します。
oc get all
oc get event
oc logs POD_NAME
oc rsh POD_NAME
oc debug DC_NAME
oc explain
oc get all
とりあえず状況を見るのに便利なのがoc get allです。-o wideオプションを付けるとノード名表示などちょっと情報が増えるので基本的につけたほうが良いです。
$ oc get all -o wide
NAME                         TYPE      FROM      LATEST
buildconfigs/hello-sinatra   Source    Git       1

NAME                     TYPE      FROM          STATUS     STARTED      DURATION
builds/hello-sinatra-1   Source    Git@cf28c79   Complete   4 days ago   1m16s

NAME                         DOCKER REPO                               TAGS      UPDATED
imagestreams/hello-sinatra   172.30.1.1:5000/test-ruby/hello-sinatra   latest    4 days ago

NAME                              REVISION   DESIRED   CURRENT   TRIGGERED BY
deploymentconfigs/hello-sinatra   1          1         1         config,image(hello-sinatra:latest)

NAME                   HOST/PORT                                       PATH      SERVICES        PORT       TERMINATION   WILDCARD
routes/hello-sinatra   hello-sinatra-test-ruby.192.168.42.225.xip.io             hello-sinatra   8080-tcp                 None

NAME                       READY     STATUS      RESTARTS   AGE       IP           NODE
po/hello-sinatra-1-build   0/1       Completed   0          4d        172.17.0.2   localhost
po/hello-sinatra-1-jxqm5   1/1       Running     1          4d        172.17.0.3   localhost

NAME                 DESIRED   CURRENT   READY     AGE       CONTAINER(S)    IMAGE(S)                                                                                                          SELECTOR
rc/hello-sinatra-1   1         1         1         4d        hello-sinatra   172.30.1.1:5000/test-ruby/hello-sinatra@sha256:623df61eea9fb550df241a2cd8e909b44fd2fb69a4d82298f7221f5c92488167   app=hello-sinatra,deployment=hello-sinatra-1,deploymentconfig=hello-sinatra

NAME                CLUSTER-IP       EXTERNAL-IP   PORT(S)    AGE       SELECTOR
svc/hello-sinatra   172.30.168.102   <none>        8080/TCP   4d        app=hello-sinatra,deploymentconfig=hello-sinatra
oc get all -o yamlを実行するとyaml形式で全ての情報をダンプします。バックアップ目的や詳細まで全てチェックする目的で取得することが多いですが、量が多いので基本的にはファイルにリダイレクトして保存して参照することになるでしょう。
また、ocに--loglevel=7というオプションを付与することによりREST APIコールのログを全て見ることができます。たとえばoc get allは以下のAPIの情報を参照しています。
$ oc get all --loglevel=7 2>&1 | grep http
I1205 16:23:49.320760    1645 round_trippers.go:383] GET https://192.168.42.225:8443/oapi/v1/namespaces/test-ruby/buildconfigs
I1205 16:23:49.335285    1645 round_trippers.go:383] GET https://192.168.42.225:8443/oapi/v1/namespaces/test-ruby/builds
I1205 16:23:49.337681    1645 round_trippers.go:383] GET https://192.168.42.225:8443/oapi/v1/namespaces/test-ruby/imagestreams
I1205 16:23:49.339604    1645 round_trippers.go:383] GET https://192.168.42.225:8443/oapi/v1/namespaces/test-ruby/deploymentconfigs
I1205 16:23:49.341773    1645 round_trippers.go:383] GET https://192.168.42.225:8443/oapi/v1/namespaces/test-ruby/routes
I1205 16:23:49.343972    1645 round_trippers.go:383] GET https://192.168.42.225:8443/api/v1/namespaces/test-ruby/pods
I1205 16:23:49.350071    1645 round_trippers.go:383] GET https://192.168.42.225:8443/api/v1/namespaces/test-ruby/replicationcontrollers
I1205 16:23:49.352935    1645 round_trippers.go:383] GET https://192.168.42.225:8443/api/v1/namespaces/test-ruby/services
I1205 16:23:49.355540    1645 round_trippers.go:383] GET https://192.168.42.225:8443/apis/apps/v1beta1/namespaces/test-ruby/statefulsets
I1205 16:23:49.357334    1645 round_trippers.go:383] GET https://192.168.42.225:8443/apis/autoscaling/v1/namespaces/test-ruby/horizontalpodautoscalers
I1205 16:23:49.359109    1645 round_trippers.go:383] GET https://192.168.42.225:8443/apis/batch/v1/namespaces/test-ruby/jobs
I1205 16:23:49.360826    1645 round_trippers.go:383] GET https://192.168.42.225:8443/apis/batch/v2alpha1/namespaces/test-ruby/cronjobs
I1205 16:23:49.362590    1645 round_trippers.go:383] GET https://192.168.42.225:8443/apis/extensions/v1beta1/namespaces/test-ruby/deployments
I1205 16:23:49.364211    1645 round_trippers.go:383] GET https://192.168.42.225:8443/apis/extensions/v1beta1/namespaces/test-ruby/replicasets
oc get event
イベントログを参照します。デプロイがうまくいかない、といった問題のヒントや原因などはほぼ全てイベントログに出力されています。CLI上でデプロイの試行錯誤をしているようなときはwatchオプション-wを利用して、常にログを出すようにしていると状況がわかりやすいです。
oc get event -w &
oc logs POD_NAME
コンテナのログを参照します。--timestampsオプションを付与するとコンテナがログにタイムスタンプを付与するかどうかにかかわらず一律でログのタイムスタンプを一緒に表示してくれます。
CrashLoop中のpodなどに対しては-pオプションを指定することで、前回起動時のログを参照できます。
oc logs --timestamps POD_NAME
oc logs -p --timestamps POD_NAME
oc rsh POD_NAME
podの中のシェルに入ることができます。コンテナ内での調査に利用します。
oc rsh POD_NAME
oc debug DC_NAME
debug用のpodを立ち上げます。コンテナイメージのEntrypointやCmdで指定されているコマンドは実行されず、シェルに入ることができるので、EntrypointやCmdで指定されているコマンドが即異常終了してしまう、といったoc rshでは調査の難しい問題に利用できます。
oc debug dc/hello-sinatra
oc explain RESOURCE_TYPE
各リソースの説明を表示してくれます。dc.spec.templateなど各リソースのyamlの構造に合わせて指定していくことで、設定項目名が思い出せない場合や、どのような設定が可能なのかといったことを調べることができます。
$ oc explain dc.spec.template
RESOURCE: template <Object>

DESCRIPTION:
     Template is the object that describes the pod that will be created if
     insufficient replicas are detected.

    PodTemplateSpec describes the data a pod should have when created from a template

FIELDS:
   metadata <Object>
     Standard object's metadata. More info:
     https://git.k8s.io/community/contributors/devel/api-conventions.md#metadata

   spec <Object>
     Specification of the desired behavior of the pod. More info: https://
     git.k8s.io/community/contributors/devel/api-conventions.md#spec-and-status/
ヘルプ
ocコマンドはヘルプが充実しています。各サブコマンドも-hオプションを付与することでヘルプが出力されます。
$ oc -h
OpenShift Client

This client helps you develop, build, deploy, and run your applications on any OpenShift or Kubernetes compatible
platform. It also includes the administrative commands for managing a cluster under the 'adm' subcommand.

Basic Commands:
  types           An introduction to concepts and types
  login           Log in to a server
  new-project     Request a new project
  new-app         Create a new application
  status          Show an overview of the current project
  project         Switch to another project
  projects        Display existing projects
  explain         Documentation of resources
  cluster         Start and stop OpenShift cluster

Build and Deploy Commands:
  rollout         Manage a Kubernetes deployment or OpenShift deployment config
  rollback        Revert part of an application back to a previous deployment
  new-build       Create a new build configuration
  start-build     Start a new build
  cancel-build    Cancel running, pending, or new builds
  import-image    Imports images from a Docker registry
  tag             Tag existing images into image streams

Application Management Commands:
  get             Display one or many resources
  describe        Show details of a specific resource or group of resources
  edit            Edit a resource on the server
  set             Commands that help set specific features on objects
  label           Update the labels on a resource
  annotate        Update the annotations on a resource
  expose          Expose a replicated application as a service or route
  delete          Delete one or more resources
  scale           Change the number of pods in a deployment
  autoscale       Autoscale a deployment config, deployment, replication controller, or replica set
  secrets         Manage secrets
  serviceaccounts Manage service accounts in your project

Troubleshooting and Debugging Commands:
  logs            Print the logs for a resource
  rsh             Start a shell session in a pod
  rsync           Copy files between local filesystem and a pod
  port-forward    Forward one or more local ports to a pod
  debug           Launch a new instance of a pod for debugging
  exec            Execute a command in a container
  proxy           Run a proxy to the Kubernetes API server
  attach          Attach to a running container
  run             Run a particular image on the cluster
  cp              Copy files and directories to and from containers.

Advanced Commands:
  adm             Tools for managing a cluster
  create          Create a resource by filename or stdin
  replace         Replace a resource by filename or stdin
  apply           Apply a configuration to a resource by filename or stdin
  patch           Update field(s) of a resource using strategic merge patch
  process         Process a template into list of resources
  export          Export resources so they can be used elsewhere
  extract         Extract secrets or config maps to disk
  idle            Idle scalable resources
  observe         Observe changes to resources and react to them (experimental)
  policy          Manage authorization policy
  auth            Inspect authorization
  convert         Convert config files between different API versions
  import          Commands that import applications
  image           Useful commands for managing images

Settings Commands:
  logout          End the current server session
  config          Change configuration files for the client
  whoami          Return information about the current session
  completion      Output shell completion code for the specified shell (bash or zsh)

Other Commands:
  help            Help about any command
  plugin          Runs a command-line plugin
  version         Display client and server versions

Use "oc <command> --help" for more information about a given command.
Use "oc options" for a list of global command-line options (applies to all commands).
OpenShiftの基本的なソースからのビルドとデプロイでアプリケーションを動かす
OpenShift 全部俺 Advent Calendar 2017
minishiftで環境ができたので、アプリケーションをビルドして動作させてみましょう。使うのはソースからコンテナイメージをビルドするs2i (source to image)と呼ばれるビルド方式です。
初期状態ではdeveloperユーザ、myprojectというプロジェクトとなっています。この情報は~/.kube/configファイルに格納されています。
$ oc whoami
developer
$ oc status
In project My Project (myproject) on server https://192.168.42.225:8443

You have no services, deployment configs, or build configs.
Run 'oc new-app' to create an application.
myprojectみたいなデフォルトのものを使うのは後から使い分けしようとしたときに困ることが多く、あまり好きではないので、別ユーザ別プロジェクトを作成します。
nekopというユーザ、アプリケーションはRubyのものを使いますので、test-rubyというプロジェクトを作成します。minishiftではAllowAllという認証設定がされているので、ユーザ名は任意、パスワードに空文字以外で全て通るようになっています。
$ oc login -u nekop
Authentication required for https://192.168.42.225:8443 (openshift)
Username: nekop
Password:
Login successful.

You don't have any projects. You can try to create a new project, by running

    oc new-project <projectname>

$ oc new-project test-ruby
Now using project "test-ruby" on server "https://192.168.42.225:8443".

You can add applications to this project with the 'new-app' command. For example, try:

    oc new-app centos/ruby-22-centos7~https://github.com/openshift/ruby-ex.git

to build a new example application in Ruby.
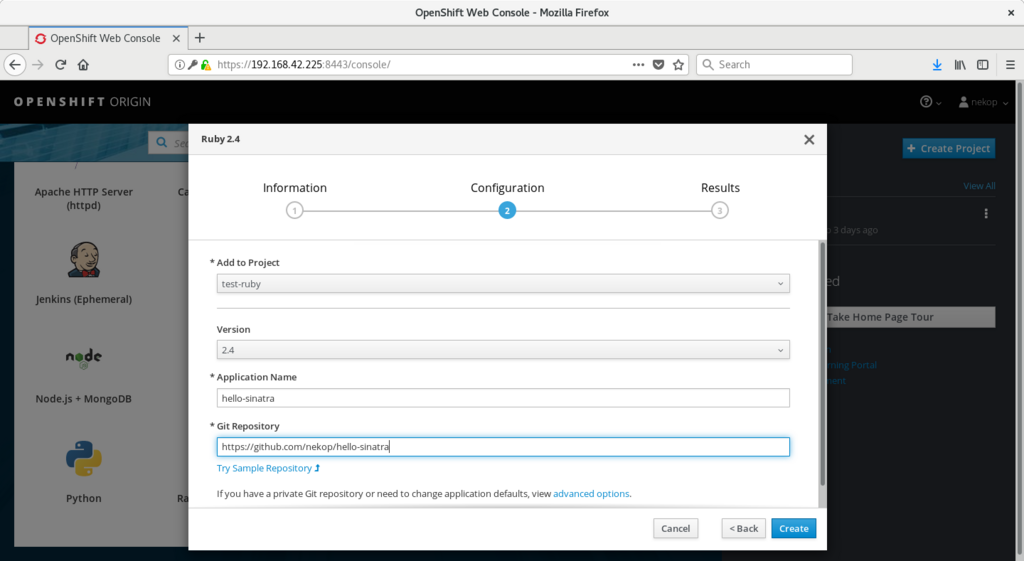
アプリケーションのソースコードを指定してoc new-appを発行します。SinatraというRubyのWebフレームワークで書いたHello Worldのアプリ https://github.com/nekop/hello-sinatra を指定しています。
$ oc new-app https://github.com/nekop/hello-sinatra
--> Found image a6f8569 (10 days old) in image stream "openshift/ruby" under tag "2.4" for "ruby"

    Ruby 2.4
    --------
    Ruby 2.4 available as docker container is a base platform for building and running various Ruby 2.4 applications and frameworks. Ruby is the interpreted scripting language for quick and easy object-oriented programming. It has many features to process text files and to do system management tasks (as in Perl). It is simple, straight-forward, and extensible.

    Tags: builder, ruby, ruby24, rh-ruby24

    * The source repository appears to match: ruby
    * A source build using source code from https://github.com/nekop/hello-sinatra will be created
      * The resulting image will be pushed to image stream "hello-sinatra:latest"
      * Use 'start-build' to trigger a new build
    * This image will be deployed in deployment config "hello-sinatra"
    * Port 8080/tcp will be load balanced by service "hello-sinatra"
      * Other containers can access this service through the hostname "hello-sinatra"

--> Creating resources ...
    imagestream "hello-sinatra" created
    buildconfig "hello-sinatra" created
    deploymentconfig "hello-sinatra" created
    service "hello-sinatra" created
--> Success
    Build scheduled, use 'oc logs -f bc/hello-sinatra' to track its progress.
    Application is not exposed. You can expose services to the outside world by executing one or more of the commands below:
     'oc expose svc/hello-sinatra'
    Run 'oc status' to view your app.
openshift/ruby:2.4というイメージを利用してアプリケーションがビルドされています。
状況を確認するコマンドはいろいろあります。oc status, oc get all, oc logs, oc get eventなどです。細かい説明は後日やります。たぶん。
$ oc status
In project test-ruby on server https://192.168.42.225:8443

svc/hello-sinatra - 172.30.168.102:8080
  dc/hello-sinatra deploys istag/hello-sinatra:latest <-
    bc/hello-sinatra source builds https://github.com/nekop/hello-sinatra on openshift/ruby:2.4
      build #1 running for 22 seconds - cf28c79: Add index.html (Takayoshi Kimura <takayoshi@gmail.com>)
    deployment #1 waiting on image or update

View details with 'oc describe <resource>/<name>' or list everything with 'oc get all'.

$ oc get all
NAME                         TYPE      FROM      LATEST
buildconfigs/hello-sinatra   Source    Git       1

NAME                     TYPE      FROM          STATUS    STARTED          DURATION
builds/hello-sinatra-1   Source    Git@cf28c79   Running   48 seconds ago

NAME                         DOCKER REPO                               TAGS      UPDATED
imagestreams/hello-sinatra   172.30.1.1:5000/test-ruby/hello-sinatra

NAME                              REVISION   DESIRED   CURRENT   TRIGGERED BY
deploymentconfigs/hello-sinatra   0          1         0         config,image(hello-sinatra:latest)

NAME                       READY     STATUS    RESTARTS   AGE
po/hello-sinatra-1-build   1/1       Running   0          48s

NAME                CLUSTER-IP       EXTERNAL-IP   PORT(S)    AGE
svc/hello-sinatra   172.30.168.102   <none>        8080/TCP   48s

$ oc logs hello-sinatra-1-build -f
---> Installing application source ...
---> Building your Ruby application from source ...
---> Running 'bundle install --deployment --without development:test' ...
Fetching gem metadata from https://rubygems.org/.........
Fetching version metadata from https://rubygems.org/.
Installing rake 11.1.2
Installing power_assert 0.2.7
Installing rack 1.6.4
Installing tilt 2.0.2
Using bundler 1.13.7
Installing test-unit 3.1.8
Installing rack-protection 1.5.3
Installing rack-test 0.6.3
Installing sinatra 1.4.7
Bundle complete! 4 Gemfile dependencies, 9 gems now installed.
Gems in the groups development and test were not installed.
Bundled gems are installed into ./bundle.
---> Cleaning up unused ruby gems ...
Running `bundle clean   --verbose` with bundler 1.13.7
Found no changes, using resolution from the lockfile
/opt/app-root/src/bundle/ruby/2.4.0/gems/rake-11.1.2/lib/rake/ext/fixnum.rb:4: warning: constant ::Fixnum is deprecated
Pushing image 172.30.1.1:5000/test-ruby/hello-sinatra:latest ...
Pushed 0/10 layers, 0% complete
Pushed 1/10 layers, 14% complete
Pushed 2/10 layers, 25% complete
Pushed 3/10 layers, 31% complete
Pushed 4/10 layers, 43% complete
Pushed 5/10 layers, 53% complete
Pushed 6/10 layers, 65% complete
Pushed 7/10 layers, 75% complete
Pushed 8/10 layers, 84% complete
Pushed 9/10 layers, 99% complete
Pushed 10/10 layers, 100% complete
Push successful

$ oc get event
LASTSEEN   FIRSTSEEN   COUNT     NAME                     KIND                    SUBOBJECT                                TYPE      REASON                     SOURCE                        MESSAGE
2m         2m          1         hello-sinatra-1-build    Pod                                                              Normal    Scheduled                  default-scheduler             Successfully assigned hello-sinatra-1-build to localhost
2m         2m          1         hello-sinatra-1-build    Pod                                                              Normal    SuccessfulMountVolume      kubelet, localhost            MountVolume.SetUp succeeded for volume "crio-socket"
2m         2m          1         hello-sinatra-1-build    Pod                                                              Normal    SuccessfulMountVolume      kubelet, localhost            MountVolume.SetUp succeeded for volume "buildworkdir"
2m         2m          1         hello-sinatra-1-build    Pod                                                              Normal    SuccessfulMountVolume      kubelet, localhost            MountVolume.SetUp succeeded for volume "docker-socket"
2m         2m          1         hello-sinatra-1-build    Pod                                                              Normal    SuccessfulMountVolume      kubelet, localhost            MountVolume.SetUp succeeded for volume "builder-dockercfg-2g5jw-push"
2m         2m          1         hello-sinatra-1-build    Pod                                                              Normal    SuccessfulMountVolume      kubelet, localhost            MountVolume.SetUp succeeded for volume "builder-token-q8h4n"
2m         2m          1         hello-sinatra-1-build    Pod                     spec.initContainers{git-clone}           Normal    Pulling                    kubelet, localhost            pulling image "openshift/origin-sti-builder:v3.7.0"
2m         2m          1         hello-sinatra-1-build    Pod                     spec.initContainers{git-clone}           Normal    Pulled                     kubelet, localhost            Successfully pulled image "openshift/origin-sti-builder:v3.7.0"
2m         2m          1         hello-sinatra-1-build    Pod                     spec.initContainers{git-clone}           Normal    Created                    kubelet, localhost            Created container
2m         2m          1         hello-sinatra-1-build    Pod                     spec.initContainers{git-clone}           Normal    Started                    kubelet, localhost            Started container
2m         2m          1         hello-sinatra-1-build    Pod                     spec.initContainers{manage-dockerfile}   Normal    Pulled                     kubelet, localhost            Container image "openshift/origin-sti-builder:v3.7.0" already present on machine
2m         2m          1         hello-sinatra-1-build    Pod                     spec.initContainers{manage-dockerfile}   Normal    Created                    kubelet, localhost            Created container
2m         2m          1         hello-sinatra-1-build    Pod                     spec.initContainers{manage-dockerfile}   Normal    Started                    kubelet, localhost            Started container
2m         2m          1         hello-sinatra-1-build    Pod                     spec.containers{sti-build}               Normal    Pulled                     kubelet, localhost            Container image "openshift/origin-sti-builder:v3.7.0" already present on machine
2m         2m          1         hello-sinatra-1-build    Pod                     spec.containers{sti-build}               Normal    Created                    kubelet, localhost            Created container
2m         2m          1         hello-sinatra-1-build    Pod                     spec.containers{sti-build}               Normal    Started                    kubelet, localhost            Started container
1m         1m          1         hello-sinatra-1-deploy   Pod                                                              Normal    Scheduled                  default-scheduler             Successfully assigned hello-sinatra-1-deploy to localhost
1m         1m          1         hello-sinatra-1-deploy   Pod                                                              Normal    SuccessfulMountVolume      kubelet, localhost            MountVolume.SetUp succeeded for volume "deployer-token-82bmt"
1m         1m          1         hello-sinatra-1-deploy   Pod                     spec.containers{deployment}              Normal    Pulled                     kubelet, localhost            Container image "openshift/origin-deployer:v3.7.0" already present on machine
1m         1m          1         hello-sinatra-1-deploy   Pod                     spec.containers{deployment}              Normal    Created                    kubelet, localhost            Created container
1m         1m          1         hello-sinatra-1-deploy   Pod                     spec.containers{deployment}              Normal    Started                    kubelet, localhost            Started container
1m         1m          1         hello-sinatra-1-deploy   Pod                     spec.containers{deployment}              Normal    Killing                    kubelet, localhost            Killing container with id docker://deployment:Need to kill Pod
1m         1m          1         hello-sinatra-1-jxqm5    Pod                                                              Normal    Scheduled                  default-scheduler             Successfully assigned hello-sinatra-1-jxqm5 to localhost
1m         1m          1         hello-sinatra-1-jxqm5    Pod                                                              Normal    SuccessfulMountVolume      kubelet, localhost            MountVolume.SetUp succeeded for volume "default-token-fhb4l"
1m         1m          1         hello-sinatra-1-jxqm5    Pod                     spec.containers{hello-sinatra}           Normal    Pulling                    kubelet, localhost            pulling image "172.30.1.1:5000/test-ruby/hello-sinatra@sha256:623df61eea9fb550df241a2cd8e909b44fd2fb69a4d82298f7221f5c92488167"
1m         1m          1         hello-sinatra-1-jxqm5    Pod                     spec.containers{hello-sinatra}           Normal    Pulled                     kubelet, localhost            Successfully pulled image "172.30.1.1:5000/test-ruby/hello-sinatra@sha256:623df61eea9fb550df241a2cd8e909b44fd2fb69a4d82298f7221f5c92488167"
1m         1m          1         hello-sinatra-1-jxqm5    Pod                     spec.containers{hello-sinatra}           Normal    Created                    kubelet, localhost            Created container
1m         1m          1         hello-sinatra-1-jxqm5    Pod                     spec.containers{hello-sinatra}           Normal    Started                    kubelet, localhost            Started container
2m         2m          1         hello-sinatra-1          Build                                                            Normal    BuildStarted               build-controller              Build test-ruby/hello-sinatra-1 is now running
1m         1m          1         hello-sinatra-1          Build                                                            Normal    BuildCompleted             build-controller              Build test-ruby/hello-sinatra-1 completed successfully
1m         1m          1         hello-sinatra-1          ReplicationController                                            Normal    SuccessfulCreate           replication-controller        Created pod: hello-sinatra-1-jxqm5
2m         2m          1         hello-sinatra            BuildConfig                                                      Warning   BuildConfigTriggerFailed   buildconfig-controller        error triggering Build for BuildConfig test-ruby/hello-sinatra: Internal error occurred: build config test-ruby/hello-sinatra has already instantiated a build for imageid centos/ruby-24-centos7@sha256:905b51254a455c716892314ef3a029a4b9a4b1e832a9a1518783577f115956fd
1m         1m          1         hello-sinatra            DeploymentConfig                                                 Normal    DeploymentCreated          deploymentconfig-controller   Created new replication controller "hello-sinatra-1" for version 1

$ oc get pod
NAME                    READY     STATUS      RESTARTS   AGE
hello-sinatra-1-build   0/1       Completed   0          1m
hello-sinatra-1-jxqm5   1/1       Running     0          25s
最後の出力を見るとアプリケーションのpodがRunningになっているので正常にデプロイされているようです。
oc new-appコマンドでは外部アクセス用のRouteは自動的に作成されないので、作成してアクセスしてみます。
$ oc expose svc hello-sinatra
route "hello-sinatra" exposed
$ oc get route
NAME            HOST/PORT                                       PATH      SERVICES        PORT       TERMINATION   WILDCARD
hello-sinatra   hello-sinatra-test-ruby.192.168.42.225.nip.io             hello-sinatra   8080-tcp                 None
$ curl hello-sinatra-test-ruby.192.168.42.225.nip.io
curl: (6) Could not resolve host: hello-sinatra-test-ruby.192.168.42.225.nip.io
あれれ、エラーになりましたね。どうやらminishiftがデフォルトで利用するDNSサービスの nip.io が落ちているようです。とりあえずは同種のサービスである xip.io に変更してみましょう。
$ oc delete route hello-sinatra
route "hello-sinatra" deleted
$ oc expose svc hello-sinatra --hostname hello-sinatra-test-ruby.192.168.42.225.xip.io
route "hello-sinatra" exposed
$ oc get route
NAME            HOST/PORT                                       PATH      SERVICES        PORT       TERMINATION   WILDCARD
hello-sinatra   hello-sinatra-test-ruby.192.168.42.225.xip.io             hello-sinatra   8080-tcp                 None
$ curl hello-sinatra-test-ruby.192.168.42.225.xip.io
hello
きちんとアプリケーションからhelloが返却されました。
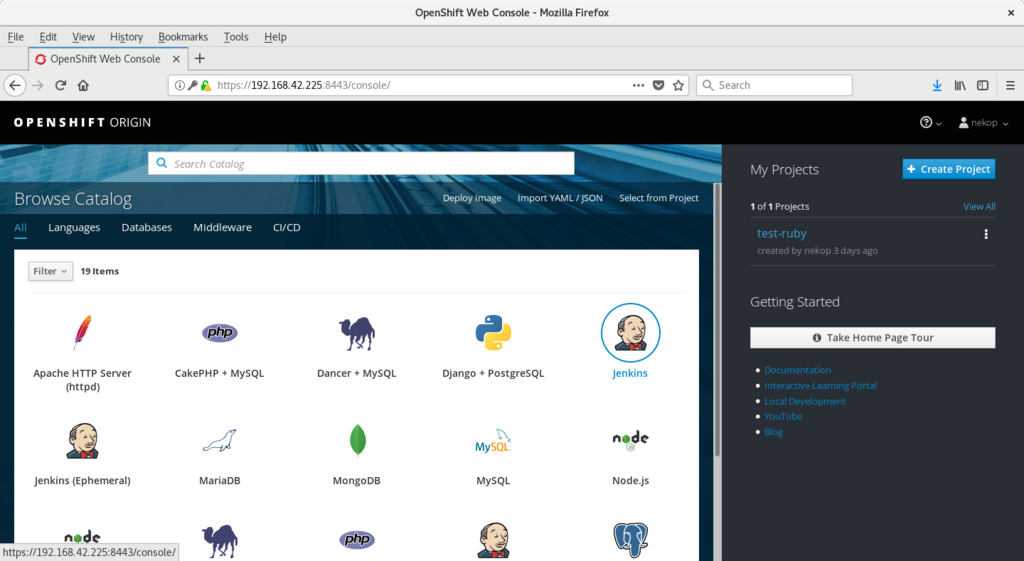
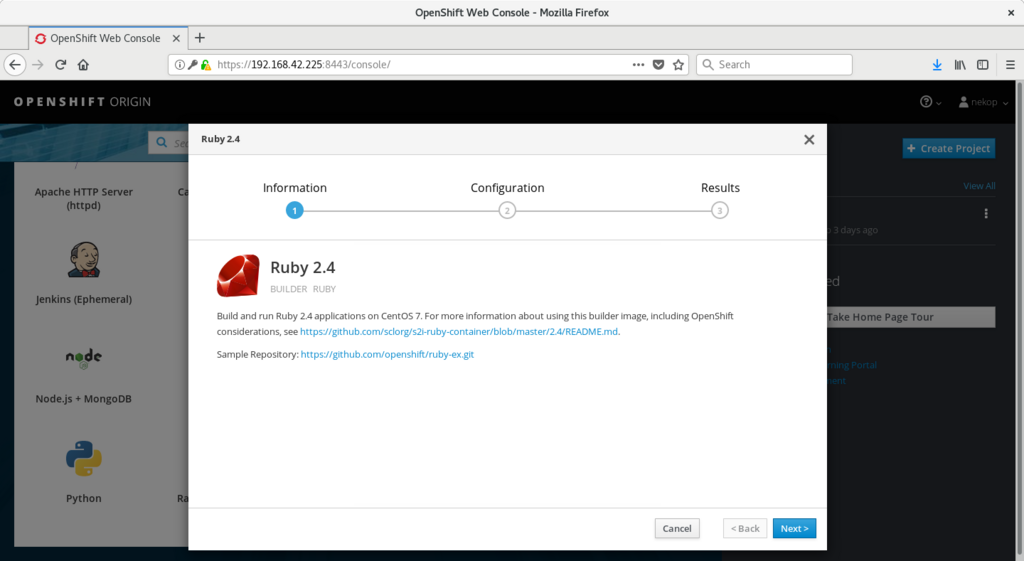
一連の操作はWebコンソール上のGUIでも可能です。minishift consoleコマンドでブラウザ上でWebコンソールが開くようになっています。


